Skip to content

Robin van Bruggen Posts

Android: Manually install the OTA update using your PC (Nexus 5)

Android version 6, or Android Marshmellow, is released today. If you, just like me, can’t wait for the automatic Over The Air (OTA) update from your provider, you can manually install this OTA update. This post describes the update process for the LG Nexus 5, But the steps are mostly the same for other phones.

[notification type=”alert-info” close=”false” class=”inf”]Using this method, your personal data on your phone will be saved. Just like a normal phone update![/notification]

Requirements

Install USB Debugging

To allow your phone to make a connection with your PC and transfer the OTA files, you need to install the Android SDK tools. These SDK tools include the right drivers for your phone. To install the OTA update, we only need the ADB and Fastboot tools from the SDK. I have used the following installation: [TOOL]Minimal ADB and Fastboot [8-28-15].

Install ‘Minimal ADB and Fastboot’ using the following steps:

  1. Download the installation files from the following website: [TOOL]Minimal ADB and Fastboot [8-28-15]
  2. Follow the installation steps from the setup and chose a location. I have chosen for c:\program files\MinimalADB\. Continue installing the tools.
  3. After the installation, go to Start -> Run -> cmd.exe
  4. Type in:  cd “c:\program files\minimaladb”

Android Marshmellow installation files

Download the Android OTA update files. In this post, I will install Android 6.0 (Marshmellow). The installation files can be found here: Android 6.0 Marshmellow.

and place the files in the installation folder where you previously have installed ADB and Fastboot. In my case, I will place them in c:\program files\MinimalADB\update.zip.

Manually push the OTA update to your phone

You can attach your phone to your pc now.

In the earlier opened command line field, execute the following steps:

  1. enter in the command line field: ‘adb devices‘ and wait for your device to turn up like ‘serienummer           devices’
  2. enter in the command line field: ‘adb reboot recovery
  3. In Recovery mode, push the volume down button untill you see Recovery Mode and press the Power Off button
  4. If the Android robot shows uyp, do the following: Hold Power Off for a few seconds and press Volume Up
  5. You will see a small menu. Press  ‘Apply update from ADB’ with the Power Off button.
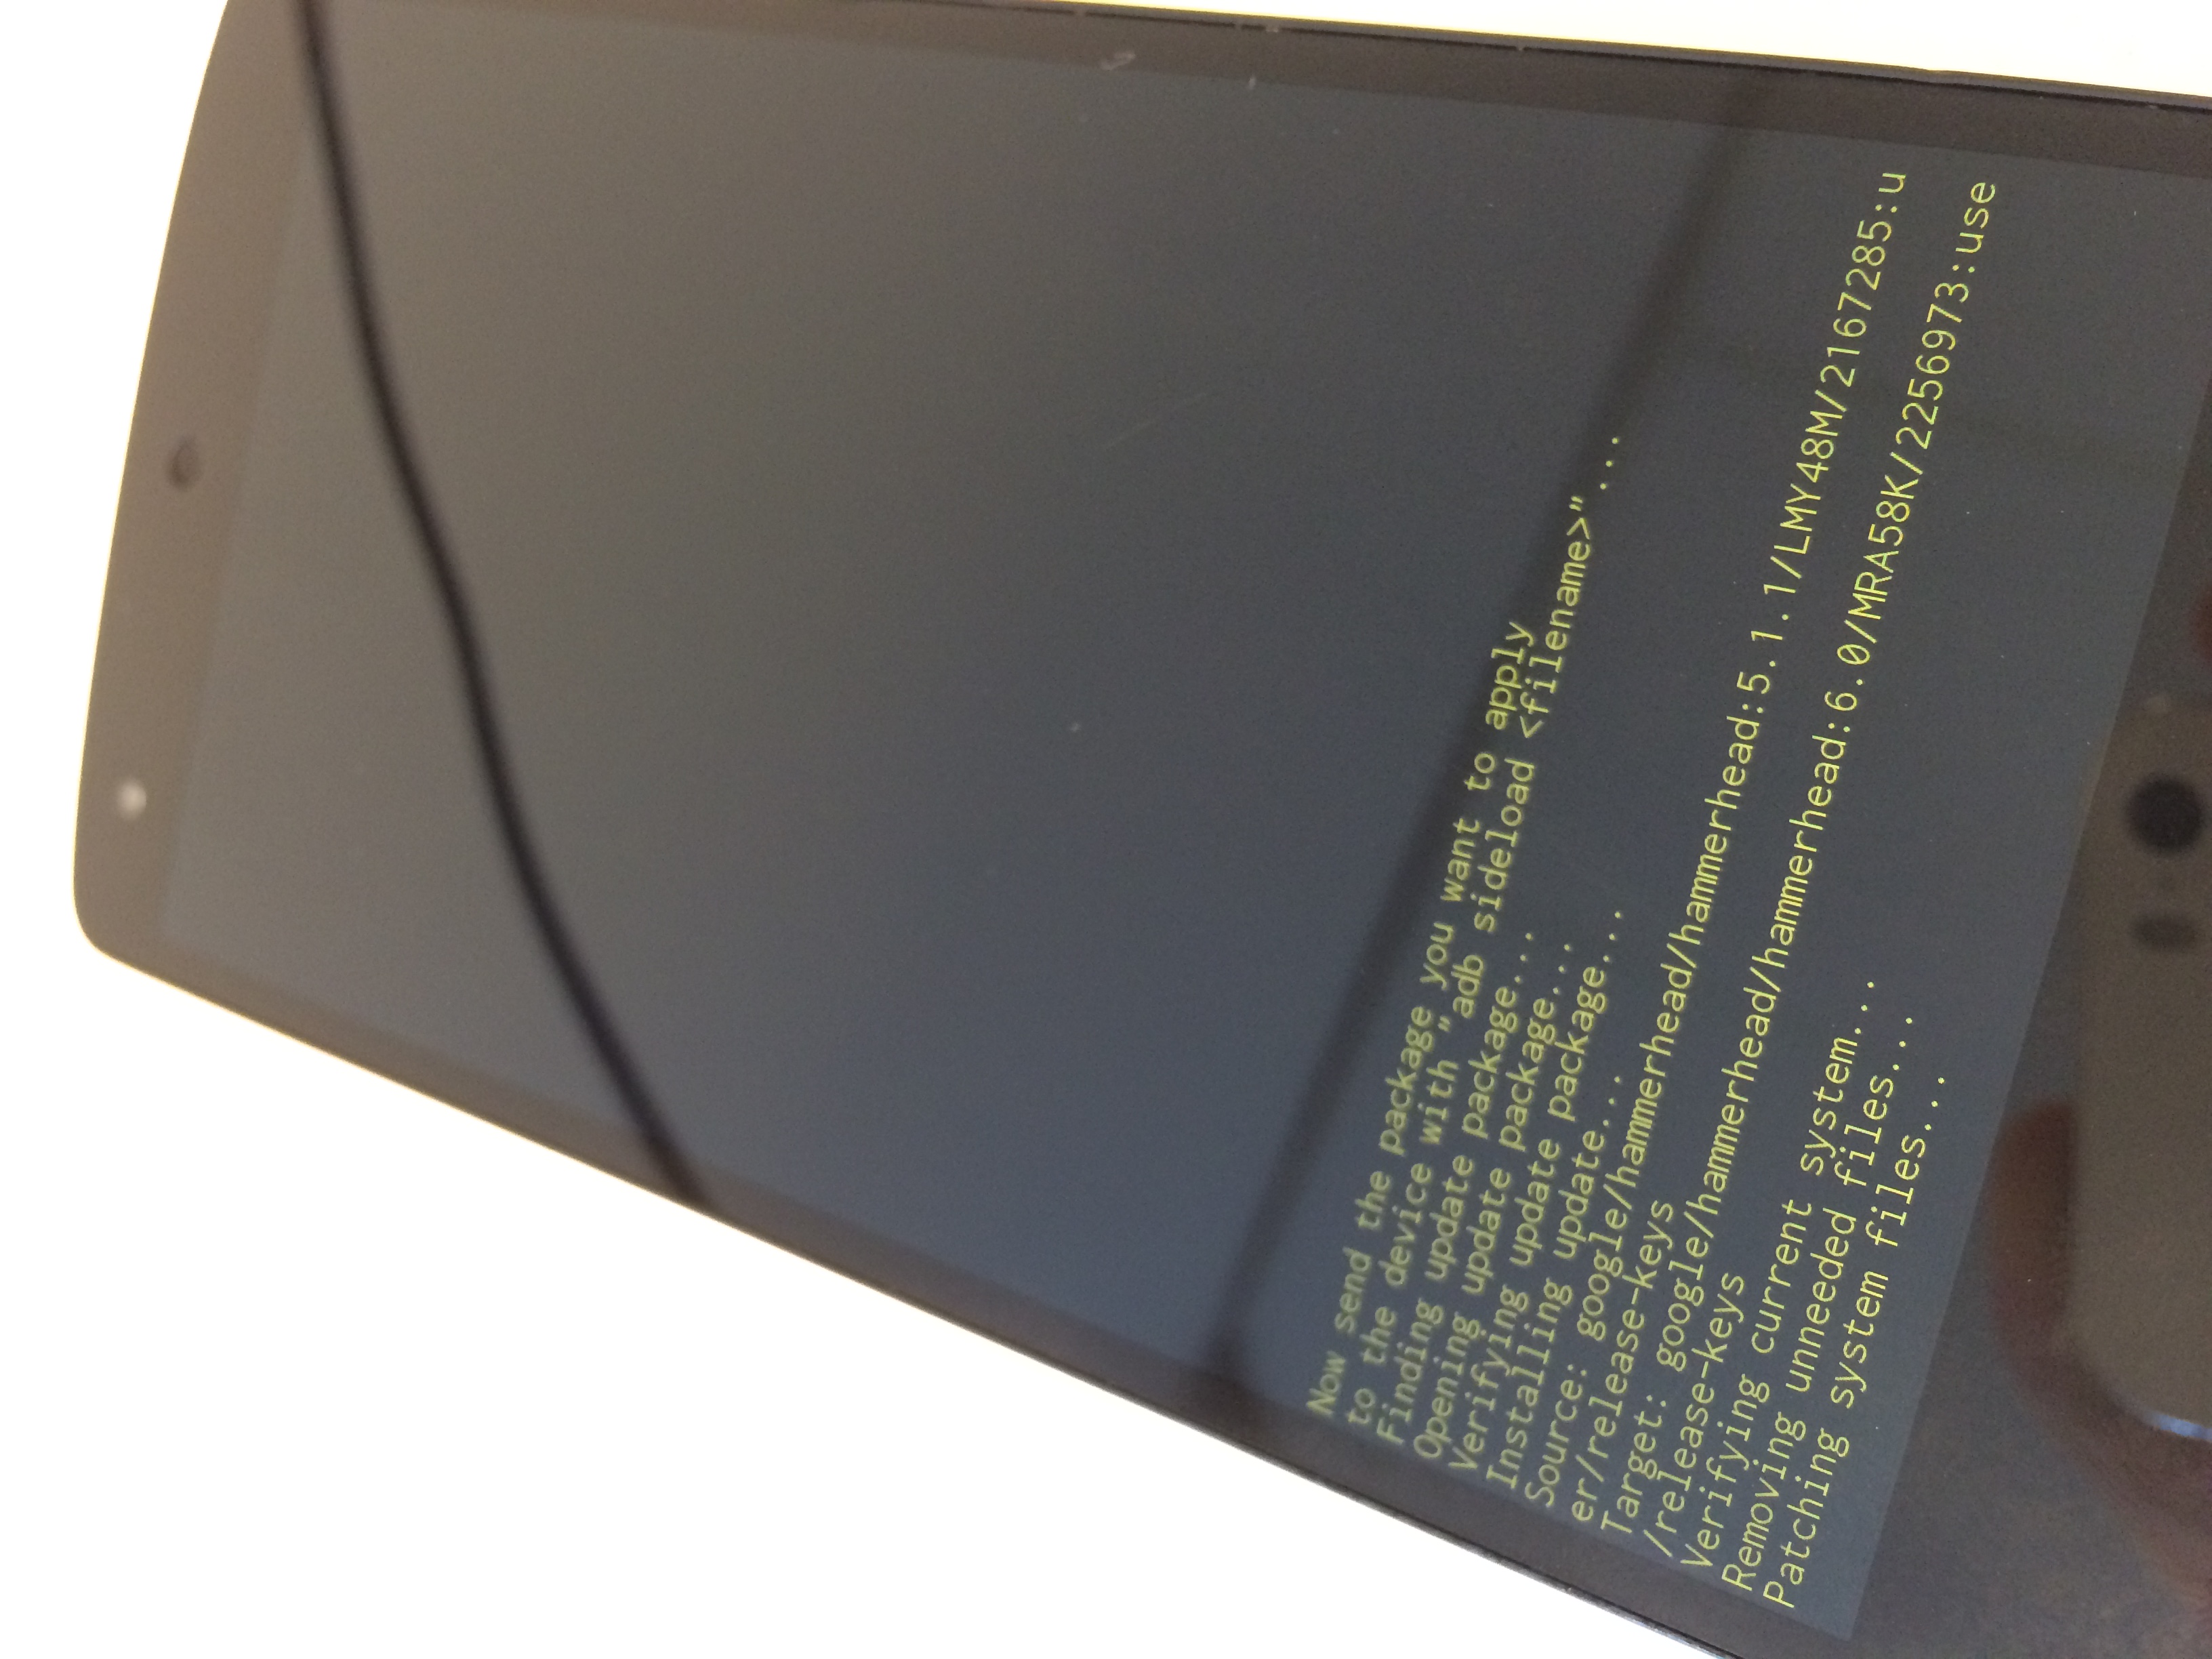
  6. enter in the command line field: ‘adb sideload update.zip

The OTA update will start now. This can take a while! It took almost 30 minutes for me. You can see the exact status in the command line field and on your phone.

IMG_2055

Leave a Comment

Request an overview of installed Microsoft Hotfixes using Powershell

One of my customers requested a overall view of the servers where one or more Microsoft Hotfixes were installed. I’ve used a small and simpel PowerShell script to do that.

This scripts uses a text file (serverlist.txt) to check which servers it needs to use to look for the Hotfix(es). Place each server ona  different line. I have placed the text file on d:\ServerLixt.txt. Use it like this:

server1
server2
server3
..etc

GetHotfix.ps1 generates a overview of installed hotfixes (in this case KB2486635) on the requested servers.

$Servers = Get-Content 'd:\ServerList.txt'
 
Invoke-Command -ComputerName $Servers -ScriptBlock {
    $Result = Get-Hotfix | where {$_.hotfixid -eq 'KB2486635'}
    if ($Result) {
        New-Object PSObject -Property @{Host = hostname; Value = $true}
    } else {
        New-Object PSObject -Property @{Host = hostname; Value = $false}
    }
}

Looking up multiple hotfixes is possibile to extend the script with multiple ‘KB12345678’. For more information about the Get-Hotfix command: slook here.

Leave a Comment

Install OpenWRT on the TP-Link TL-WR1043ND and Ziggo in Bridge Mode

I use the internet signal of the (dutch) internet provider Ziggo. Ziggo delivers a standard router, they gave me the Cisco EPC 3925. They also deliver a few other brands like Ubee and other Cisco devices. Ziggo delivers these routers with their own custom firmware and in my opinion, they are not that good. I have experienced a lot of instability issues with wired signal and (very) bad wireless signal.
Because of these issues, and hearing others complain about it too, i started looking in to placing my own router.

I have chosen to use the TP-Link TL-WR1043ND v2, because of the good reviews on Tweakers.net. The default firmware if fairly good, but I wanted some extra features.. So i’ve started to look at custom firmware.

Why OpenWRT?

I have compared a few different types of custom firmware, OpenWRT, DD-WRT and Gargoyle. All three are good, but I have chonen OpenWRT because of the following reasons:

  • Small, clean, configurable. The power of OpenWRT is in their ‘package manager’. In comparing to DD-WRT, OpenWRT gives you only a minimal installation. Other features like VPN needs to be installed using the package manager. This gives you a fast and minimal default installation. Installing new features using the package manager is done by a few simple clicks.
  • Simplicity In my opinion, the default LuCi webinterface looks good and everything is easy to find and configure. With just basic knowledge and common sense, you will be able to configure the standard configuration of your router. Without needing to know how to type in difficult commands in to the command line. The LuCI webinterface is installed by default, and you have the option to install another webinterface if you like.
    openwrtconsole

Requirements

You will (temporarily) have no internet connection during the installation of OpenWRT. Make sure you have a pc of laptop directly connected with a network cable to your router.

  • (optional) set the Ziggo router to ‘bridge mode. You will have to call the Ziggo support to do that.
  • PuTTY if you are using Windows
  • the right OpenWRT firmware (factory image). Check your TP-Link router if you have the v1 or v2 version. I have the v2.

Installation

The installation of the OpenWRT firmware on the TP-Link WR1043ND is fairly easy. Make sure you have downloaded the right factory image. Log in to the webinterface of the TP-Link. In case of the default settings this will probably be https://192.168.1.1. Go to System Tools -> Firmware Upgrade. Chose the factory image firmware you have downloaded and start the upgrade. After a few minutes, your router will reboot and OpenWRT will boot up.

That’s it. The basic installation is done. Take your time to go through the webinterface (https://192.168.1.1), configure a good and secure password for the root account, configure the wireless connection to your preferences and have fun!

Extra: Networking statistics

OpenWRT gives you real-time statistics about your network (usage) bij default. But it does not save historical data. I have installed ‘collectd’ to let the router do that. This option saves information about your network usage and uses a really small amount of storage. I have used the following manual: https://advanxer.com/blog/2013/02/openwrt-monitoring-using-collectd/.

1. Update package
opkg update
2. Install luci-app-statistics
opkg install luci-app-statistics
3. List out supported plugins for collectd
opkg list | grep collectd-mod
4. Install desired plugins
opkg install collectd-mod-cpu collectd-mod-interface collectd-mod-memory collectd-mod-ping collectd-mod-rrdtool collectd-mod-wireless
5. Enable init script
/etc/init.d/luci_statistics enable
/etc/init.d/collectd enable

openwrtstats

Comments closed